Update:
I have a new campaign to bring this upgrade to the Focal Mezzo Utopia! Stay tuned here.
Background
The Focal Profile and Chorus line shared a design that mounted the tweeter on an L shaped bracket at the top. It's fairly easy to remove it and then route a slightly larger hole for the ScanSpeak tweeter to replace it.Unfortunately I only have really good measurements from the Focal Profile 918 speakers so I can only offer you exact advice on the crossover modifications needed for them. However given how much Focal likes to re-use ideas and designs it's quite likely you can use most of this other Profile as well as the Chorus range of speakers as well.If you have speakers besides the Profile 918's you may need to take some measurements to select the correct crossover parts.
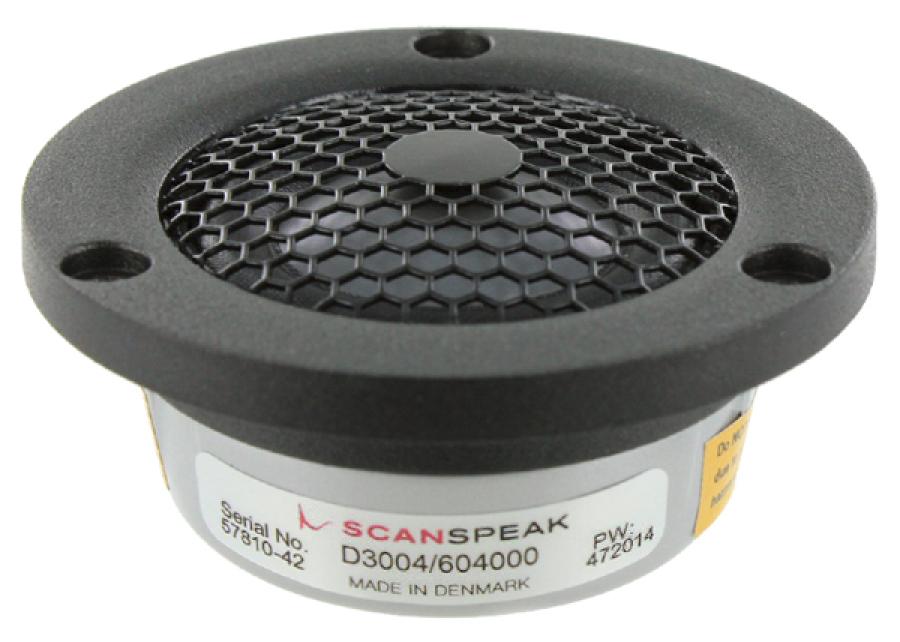 After a long search and then analysis I have found that the ScanSpeak Illuminator D3004/6040-00
is a pretty good physical, acoustical and electrical upgrade tweeter for all of the Focal Profile speakers and a relative bargain at $270 each. Since the Focal tweeters are all severely under-damped, we are using the
less damped of the two low-profile ScanSpeak Illuminator tweeters we could choose
from. If you use this tweeter's larger sibling the 6040-10 the crossover parts will not work and you won't gain much in this application except a more difficult crossover design.
After a long search and then analysis I have found that the ScanSpeak Illuminator D3004/6040-00
is a pretty good physical, acoustical and electrical upgrade tweeter for all of the Focal Profile speakers and a relative bargain at $270 each. Since the Focal tweeters are all severely under-damped, we are using the
less damped of the two low-profile ScanSpeak Illuminator tweeters we could choose
from. If you use this tweeter's larger sibling the 6040-10 the crossover parts will not work and you won't gain much in this application except a more difficult crossover design.Sadly I no longer own the Focal Profile 918's. I wish I did because if I had thought a little more about it I would have done this upgrade instead of all the others. Except pulling out the bass caps, which is still a good thing to do (see previous posting).
The chart shows the frequency response of a Focal Profile 918 before (red) and after (blue) the modifications. The raggedness you see in the Focal Profile tweeters is common to almost all Focal tweeters since they sharing a similar underlying motor structure. Tweaks to the back of the tweeter have been done in the Sopra line to unknown benefit. The infinite horn loading used in the Sopra is an idea Focal may have borrowed from Wilson Audio Specialties who did some work on improving the tweeter chamber in the previous speaker line, or from B&W's Nautilus. Sadly, the measured improvements seem modest and fail to overcome the shortcomings of the motor/dome combination in my opinion.
 |
| Focal Profile, original vs. Be Tweeter |
ScanSpeak tweeters have a much better motor structures than Focal uses in their mid-range speakers, and possibly even the Utopia's as well.
Focal Aria 936

Focal's tweeter motors have improved since the Profile range and as a result the Aria range has a much smoother treble than the Profile could achieve, as you can see in this chart from the Stereophile review of the Focal Aria 936, but in the end it is still pretty ragged.This upgrade is designed with two requirements:
- The tweeter will be flush mounted to the face of the baffle.
- The tweeter will be used without the grill cloth.
The Profile range required the grill to extend the tweeter range at the expense of the overall smoothness of the response. The superior construction and motor used by ScanSpeak makes those requirements unnecessary and the grill will actually be in the way. Chorus owners could probably go either way. However I have found the rickety plastic used tends to vibrate and create secondary sound sources. The speakers are really much better off without the grills after this upgrade.
Modifications Required
You will need to make some simple part replacements to the crossover, and you will need to expand the tweeter hole by a few millimeters to fit the larger tweeter motor. The original tweeter and bracket won't be re-used.Tools
To make the modifications you'll need:- Plunge router
- Circle cutting jig
- 1/4" Spiral upcut bit (as recommended by jig make)
- High power, preferably temperature controlled soldering iron with wide tips
- 3/4" wooden scraps.
- Long handled phillips head screwdriver to pull out crossover
- Torx T25 to pull out midrange and woofer.
- Drill with 1/8" drill bit for tweeter pilot holes.
Parts
A full schematic is provided below, this is just for reference:- 1" Beryllium low-profile tweeter: ScanSpeak Illuminator D3004/6040-00
- 10uF film Capacitor (see below for discussion)
- 0.27 mH air core or copper foil inductor
- 0.75 Ohm / 5 W Mills Resistor
- PSA backed felt (optional tweak, see below)
Crossover Changes


You'll replace the "Tweeter Resistor" with a new one. Discard both of the tweeter caps and place the replacement 10uF cap so it jumpers around both of them (C4 and C5 in the schematic).
Remove both of the donut-like coils. Replace the last one with the new 0.27mH coil and you are done!
 Here's
the revised schematic. The important part is on the top. The new high pass
filter is much simpler than the original due to better physical matching. The end result is good, but not excellent, phase matching. It's certainly much better than in the original Profile, but could be improved upon with many more parts which I think are not worth it.
Here's
the revised schematic. The important part is on the top. The new high pass
filter is much simpler than the original due to better physical matching. The end result is good, but not excellent, phase matching. It's certainly much better than in the original Profile, but could be improved upon with many more parts which I think are not worth it. Also note that the ScanSpeak Be tweeter is in phase with the midrange.
There's nothing wrong Focal inverting the tweeter to improve phase matching. Given the location of the tweeter and overall crossover design, Focal's best choice was to invert the tweeter, but it did not end with idela phase matching except at the crossover point. I suspect part of the problems Focal's designers had was with the demands of matching the original tweeter to the woofer. It was a much bigger challenge than we have.
As noted in another posting, another quick mod you can make is to eliminate C2. It's a waste of amplifier power.
Tweeter Mounting
Flush mounting the tweeter is the hardest part. What I may recommend is that you create a jig to help you use a router jig. Use a scrap of wood about 6" by 2" and in the center add a wooden disk about the same radius and depth as the existing tweeter hole. The Focal tweeters are terribly small, around 36mm, but the replacement is only about 12 mm larger. You can make the disk using the same jig which you need to route the tweeter flange and cavity. Use hot glue to attach the wooden jig to the inside of the speaker cabinet so that the disk fills in the original tweeter hole. The disk does NOT have to be a tight fit. Just so long as you can eyeball it and have even clearance all around before the hot glue sets.Caution!
Before routing anything on the speaker baffle double check that the new tweeter will have plenty of clearance after routing! Don't forget to check that you have internal clearance as well! You are going to be routing very close to the top panel. Make sure after routing that the body of the tweeter won't be blocked by the top cabinet panel. This will vary greatly by model.If In doubt, put the new center 25mm below the top of the original hole. That should ensure you have the same clearance to the top as the original tweeters. On the Focal Profile 918, this is going to be about 6mm below the original center, give or take.
Once you are sure of the center location for the new tweeter, route the flange and then the main hole. Hopefully you can then pop off the strip of wood and reuse it for the next speaker.
Be sure to drill pilot holes before attaching the screws. The MDF Focal uses is pretty soft. Attach with 3 Cap head screws per tweeter.
You may need to attach new quick-disconnects to the leads from the crossover to ensure proper polarity and sizing. If the sizes are right, but polarity is wrong you can also switch the cables at the crossover end.
Tweeter Tweak
Add your favorite color of Pressure Sensitive Adhesive (PSA) backed felt around the tweeter and all the way to the edges. It will really help increase the sense of spaciousness and smoothness. There's a reason why Wilson and Vandersteen use this approach, it works. Fortunately for us you don't have to do much to reap the rewards. A couple of $1 felt sheets from your craft store will do great things.Capacitors
It's really easy to go crazy with capacitors. My recommendation on the cheap but worthy side is a 10uF Mundorf MKP bypassed by an Audyn 0.1uF TrueCopper capacitor. That should be around $30/speaker. On the high end I suggest the Jupiter Copper Foil capacitor by itself for $399 at Sonicraft.Somewhere in the middle of the range are the ginormously sized Clarity MR caps. I strongly suggest you use multiple caps here though, it has slightly high ESR. It's a great cap, but you are better off with a pair of 4.7uF and adding an 0.68uF cap than buying the 10uF cap by itself. You could save a little money with the single 10uF cap, and maybe some sspace too but then I strongly suggest the Audyn 0.1uF TrueCopper bypass or Jupiter Copper as bypass caps.
What about the high-end Mundorfs? Sure, you can go that route, but I find they add a Disneyland-like sheen to the music that draws my attention away. If on the other hand you find it magically enchanting, that's the way you should go. That approach certainly works for Magico and their fans, so you have plenty of good company. The Mundorf EVO Silver in Oil are among the best exemplars of this. I'm not really criticizing you at all. Just letting you know what the differences are. I find the Mundorf MKP under-appreciated and more musically honest. However buy what you like, damnit, and don't let my personal ideals get in the way of your good time.
No comments:
Post a Comment